Ferrari logo Photoshop tutorial
Make Ferrari logo with an automotive theme background in a quick Photoshop tutorial.

Format: PSD
Keywords: automotive theme design, make Ferrari logo in Photoshop, quick and easy Photoshop tutorials
Author: PSDGraphics.com
Quick text tutorial:
Install the Ferro Rosso font (it’s probably not installed on you machine) before you start this tutorial.
Step 1. Open a new document – 1280x1024px.
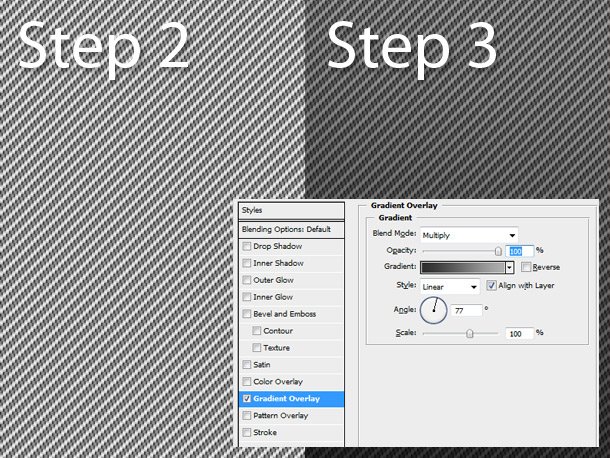
Step 2. Paste my carbon fiber texture in the background, or fill it with black color or any other dark texture.
Step 3. Apply gradient overlay to the carbon fiber background (double click on the background layer in layers window) with these options:
Gray gradient colors – #2d2d2d and #b0b0b0
Step 4. Use text tool and type “Ferrari” using Ferro Rosso font (download link is above).
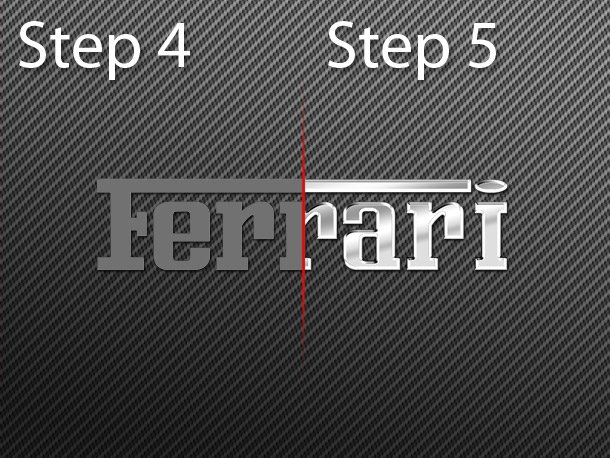
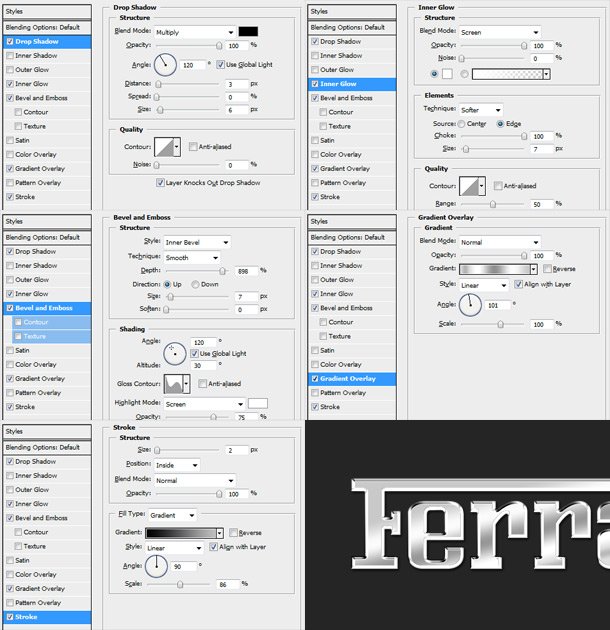
Step 5. Add silver metal text style with these parameters:
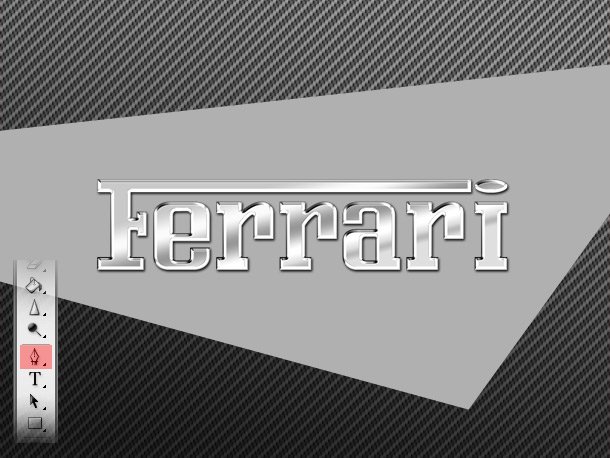
Step 6. Make a simple triangle with pen tool (under Ferrari text layer).
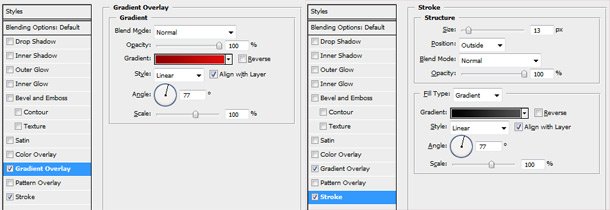
Step 7. Add red gradient and border to it.
Red gradient – #8f0000 and #dd0d0d
Gray border – #000000 and #bcbcbc
We are done, you should get something like this.

Download my PSD source:


